Safety Tip: Always wear safety glasses when working with tools that could make something “fly” around. That actually means anytime your are using tools whether hand or power. You only have one set of eyes, protect them.
 Next finish setting the 2×2 attached to the ends of the box. Drill three pilot holes on each end of the box into the 2×2. One in the center and approximately 1/3 of the way to each end. Complete the attachment by fastening with 3″ screws through each pilot hole.
Now you need to cut the 1x4x10 pieces to the inside length of the box. Measure the inside of the box and cut these pieces to that length. Lay them in the box. One on each side butted up to the sides and one approximately in the middle. Attach these to the 2×2 cross pieces with 1 3/8 deck screws.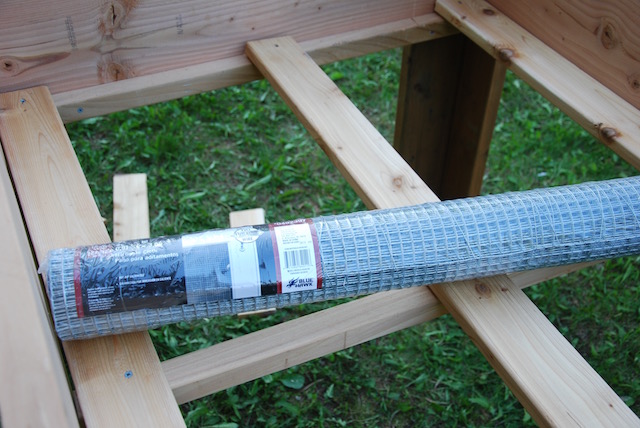
The hardware cloth installation is next. One buys this 3 feet wide because it exactly fits in the box. You won’t have to cut to make it fit width wise. First thing you will want to do is put washers on 15 of the short screws so they are ready to use in attaching the hardware cloth. Unwrap the hardware cloth and remove the wire binding. You will need to roll out just about the whole thing in order to make it fit properly. I usually get it lined up side-to-side and then pull it down to one end  tight against the end of the box. Attach this with a washer and screw through the cross piece and 2×2. Go to the other end and push the the cloth into the other end of the box to get an idea of where to cut it. Since we are not building furniture you can be as much as a half inch short on the cut and no one will know. Use the sheet metal cutter to cut the cloth to length. You could also us a wire cutter but it takes longer. Press the cut piece back into the box. Use the rest of the screws with washers to attach the hardware cloth starting at one end and moving to the other.
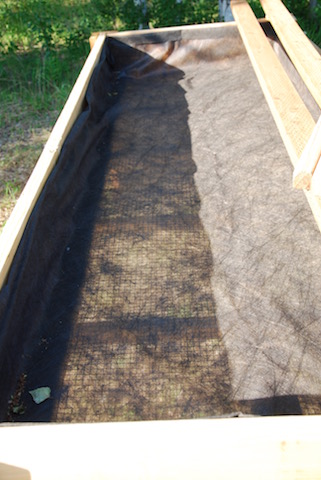 The last construction step is to put the landscape fabric in the box. The fabric I purchased is 4 feet wide. This is actually more convenient that 3 feet wide. I cut two 12 foot pieces of fabric to put in the box. I laid it in the bottom flush to one side so it would run up the other side. I stapled the fabric in place. It’s not necessary to use a lot of staples because you are going to fill this box with soil. The dirt is what actually holds it in place. The second piece I laid in completely overlapping the bottom (two layers) and then stapled it into place on up the sides. The box is now complete and ready for soil.
This box will contain about 1 cubic yard of soil. If you buy it in 3 cubic foot bags you will need at least 8 of them. At $15 a bag that’s $120. I would suggest that you find someone with a pick-up truck and one of the many places that sell topsoil and load it in the truck. If you need to you can use a wheel barrow and a shovel to get the soil form the truck to the box. The price of that will be about $20.
The size of the box can easily be changed if this one is too big. If it’s too deep to meet your needs by lumber for the sides that is 10, 8, or 6 inches wide. If it’s too long shorten it. If it’s too wide don’t cut the ends quite as long. Narrower lumber is cheaper as is shorted lumber. If you want it higher or lower, lengthen or shorten the legs as appropriate. If you make it significantly shorter in length you could probably use 2×4 lumber for the legs.
Don’t use treated lumber where the soil you are planting in might come in contact with the lumber. This is unhealthy at best and could make you sick.
Enjoy your garden.
Sources:
www.instructables.com/id/Raised-Garden-Bed-on-legs/
www.youtube.com/watch?v=f12F7aNBHUQ
www.addicted2decorating.com/how-to-build-an-elevated-garden.html
www.wisconsinmommy.com/build-elevated-raised-garden-bed/
ana-white.com/2012/11/plans/counter-height-garden-boxes-2-feet-x-4-feet
and many, many others.
About Don Bladow
Twitter •