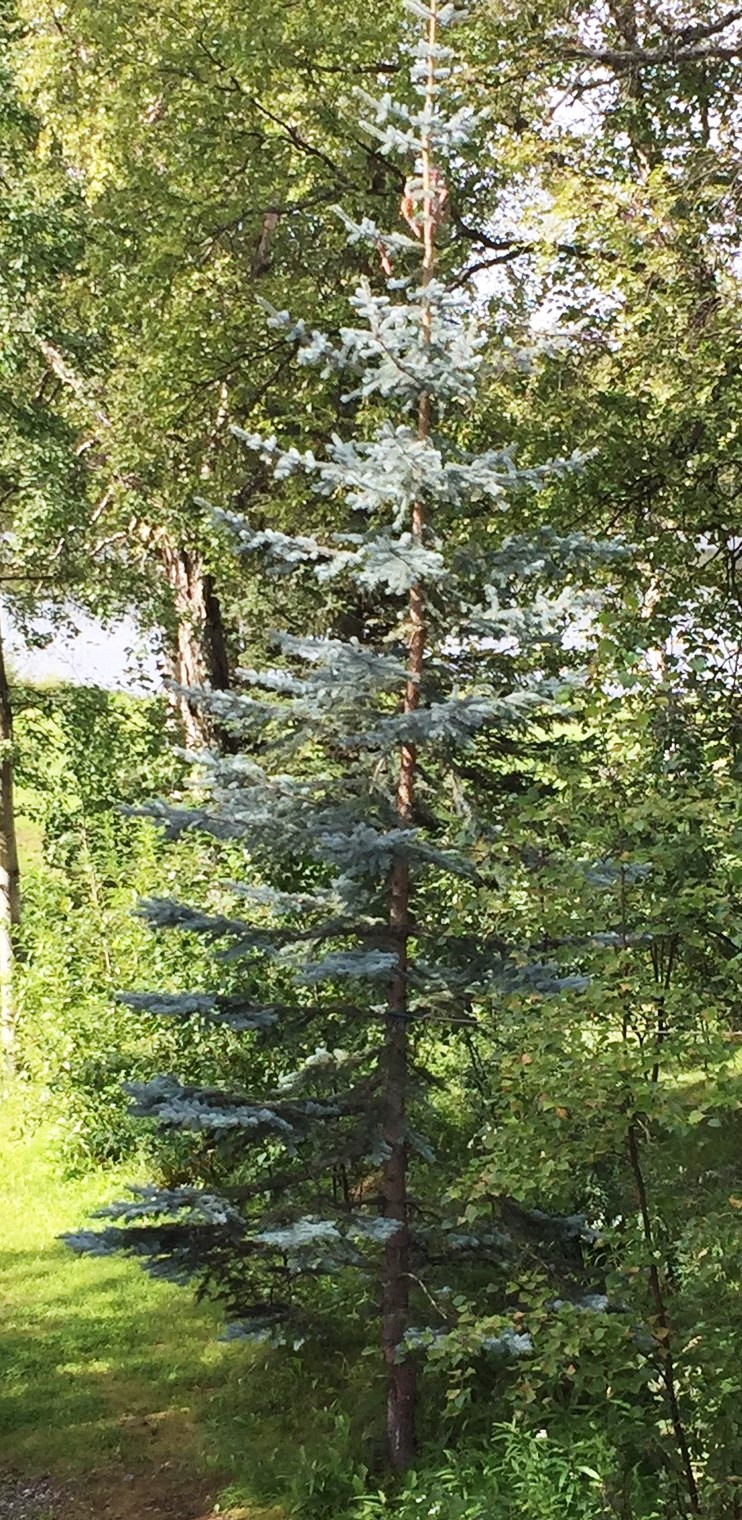
My father-in-law is a long time wholesale nursery owner in Oregon. He learned the trade from his nurseryman uncle, who also inspired the Waconda Blue, a variety of the Colorado blue spruce (Picea pungens) that is now living in my family’s backyard in Alaska. The original was selected in 1977 for its very blue hue. Cuttings were taken and the Waconda Blue was established. A child of the tree was given to my husband in the mid-80s. He transplanted it in 1992 in Wasilla and it’s still growing beautifully. We’d hate to lose it to weather or pests and would love to have it at our property in Talkeetna. We’ve decided to attempt to follow in our family footsteps and grow more trees from cuttings. I’ve only grown plants from seeds or starts so this will be a new experience for me. I started with several conversations with my in-laws and then searched the Internet.
The Waconda Blue was named after a region in the rich farmland of Oregon’s Willamette Valley. The tree growing in Wasilla has survived two moves and many Alaska winters so I thought it must have adapted and be considered a strong candidate with “good roots” so-to-speak. This spruce is a regional variation and I wasn’t able to find any specific research though there is a lot on the Colorado blue spruce. Additionally, instructions for taking cuttings from soft, semi-soft, and hardwoods are similar so I was able to do a lot of reading and compile similar steps.
Possible Propagation Techniques
The seeds found in the cones, which often form after about 20 years of growth, is generally the most successful propagation method according to this article. My tree certainly meets this age requirement and is producing cones. I will likely trying growing a few trees using this technique as a backup to the cuttings.
Grafting is another option where scions are grafted on other Picea varieties, though I remember from my readings that one gardener grafted to apple trees. Sounds like a science experiment! Finally, I briefly read about micro-propagation by somatic embryogenesis or meristem. These are way out of my league. I’ll stick to seeds and cuttings.
The Ortet
I came across several opinions about the most appropriate time of the year to take cuttings as well as the optimum age of the ortet. This article from 1973 introduced me to a new word (ortet: the original plant from which the members of a clone have descended, according to Merriam Webster) and was also very informative. I should have a better chance with cuttings from an ortet less than 10 years old, but I’m hoping our tree is stronger after living in Alaska for so many years and has possibly adapted to this climate.
Cuttings should be taken from the current year’s growth opting for healthy shoots from the lower portion of the tree. Generally late summer and early fall is best as the growth is less soft but has matured. I plan to take 10 cuttings, at least 3-5 inches in length. This should give me enough in case some of the cuttings don’t survive, but won’t be too many trees should they all survive. Before planting, the base of the cutting should be re-cut at an angle and the bottom two-thirds stripped of the needles.
Getting Started
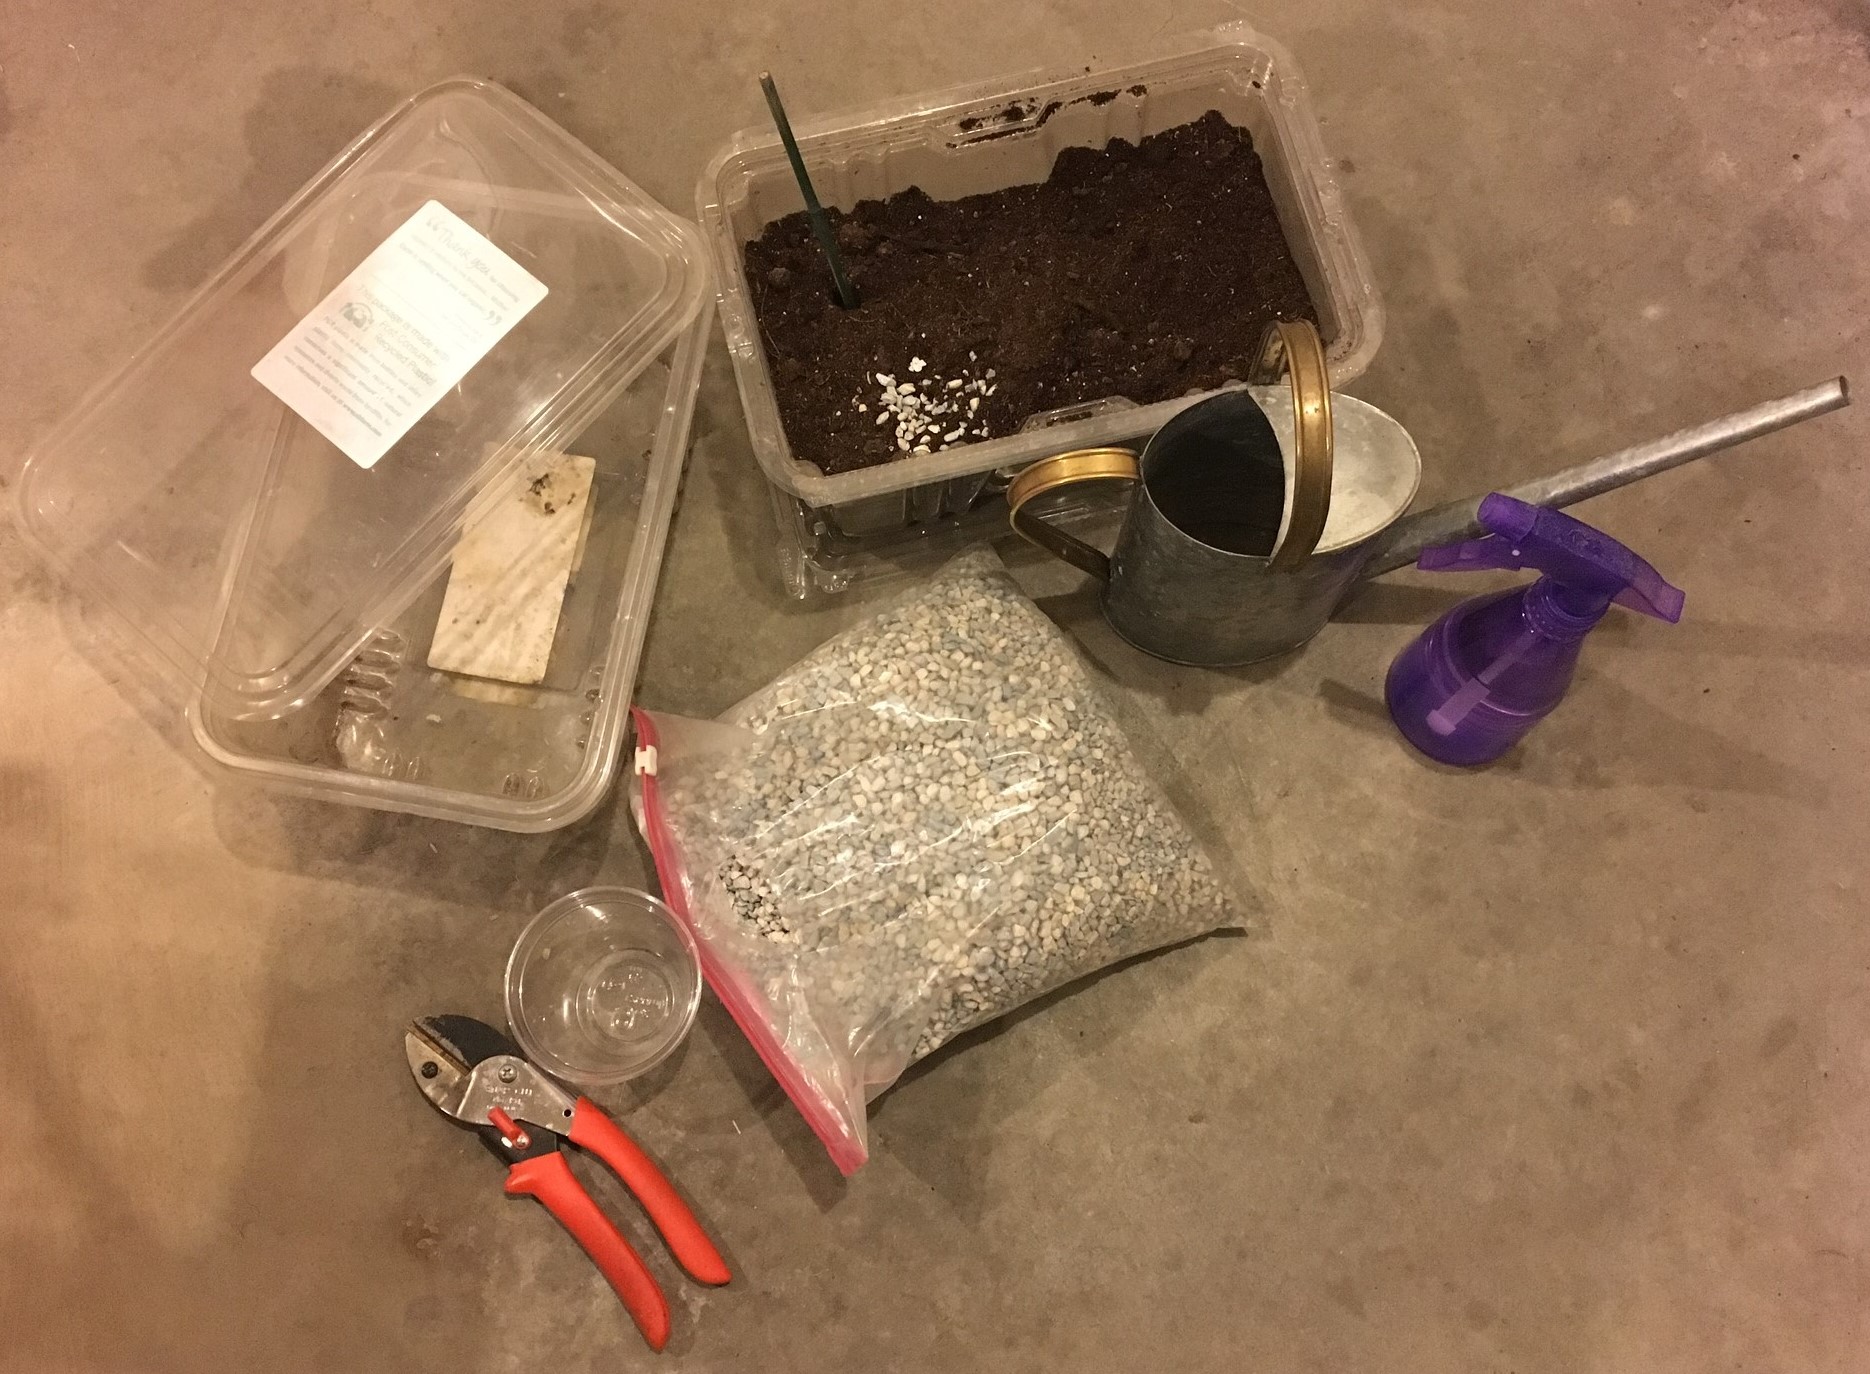
I assembled my tools. I’ll use the pruners to take the cuttings from the ortet (I love that word!). I’ll fill the plastic bins with a sandy peat for good drainage and water it to make sure it’s damp before planting. Fertilizer is not recommended at this stage. I’m going to purchase rooting compound, which can come in liquid, powder, or gel forms. There are many options and I’m hoping to find an indolebutyric acid (IBA) product as that seems most widely recommended. Root inducing hormones do not ensure success but I’d like to try something new, that’s what the plastic cup in the picture is for. Some propagators also suggest sanitizing shears in isopropyl alcohol and making sure that your containers are clean before you plant.
Light, Warmth, and Humidity
After I’ve prepared my cuttings, tapped off any excess rooting compound, and planted them fairly deeply into my containers and pressed out any air around the soil and stems, I need to keep an eye on the light, warmth, and humidity. All of the readings recommend light, but not direct sunlight; warmth, but not heat; and humidity without drenching the cuttings. I’ll cover my containers with lids though they are a clear plastic so I need to take care to expose them to real or artificial light. Setting them outside in the sun is not a good idea but in the shade is an option. Some growers put their containers on a heating mat. I may set mine on the heat registers in our house as we have a gentle furnace. Finally, misting the plants was highly recommended and keeping the environment in the containers humid. I’ll put the lids on my containers and watch to make sure humidity is present, but not so much that mold grows.
The Final Countdown
The information I read didn’t give exact timelines for what I should expect after planting the cuttings. They will be ready to re-pot to larger containers when I can see roots forming in the soil. That is the indicator of success. I’m guessing this will take at least a month. I’ll upgrade their containers, continue growing through the winter, and try transplanting in the early summer when the soil has warmed. Hopefully this will allow enough time for the roots to take hold before they enter their first outdoor winter. If anyone has suggestions, please comment!
As I’m learning about gardening in general, there are many ways to accomplish the same goal. Some processes are more fruitful than others, but most will result in some sort of growth. We’re dealing with plants here, they WANT to grow! After my research on cultivating cuttings, I’ve learned that you can take a very scientific approach, carefully follow very specific steps, and possibly have a high percentage of success. You can also take a less technical approach, execute the most important factors, and still have success. I’m going for middle-of-the-road. Wish me luck and I’ll report back in the spring!
Update August 2018
Sadly, my experiment was unsuccessful. A few months after planting, the cuttings got fuzzy in the container. I opened the lid during the day with the thought of allowing airflow and covered at night thinking it would keep the heat in. I ended up composting the batch with a big sigh and feeling discouraged.
I just got back from visiting the nursery where this spruce was born and asked the family pros what they think went wrong. They confirmed that my process was appropriate in shoot selection and preparation. They suggested covering during the day and opening at night. I’ll also try a heat mat and will not water as often as I did. Off to the gardening store and the mother tree I go! Wish me luck!
About Mimi Corneliussen
Twitter •
I hope you’ll come back and update this blog as your cuttings mature!
I would love to see the cuttings mature as well. I am thinking about doing some of my own and watching the magic happen. This article was very informational and was a great read. Thank you very much and I hope to see the update on those cuttings.
How did this work out? I was recently devastated when a neighbor chopped down some beautiful spruce my old neighbor had grown from small potted plants, they are at the most 8 years old. I cut off some various small branches,trying to get new growth the best I could, and I’m going to buy some rooting hormone today. Wondering if I can use a regular “seed starter†mix for the medium? I figure it’s worth a try & gives me an outlet for my broken heart over these very special trees. (This is Wisconsin & it is still cool, just started to warm up past three days-we have patches of glacier like snow on the ground & I keep saying I feel like we are in Alaska!).
I’d appreciate any advice on propagation of these spruce. Thank you.