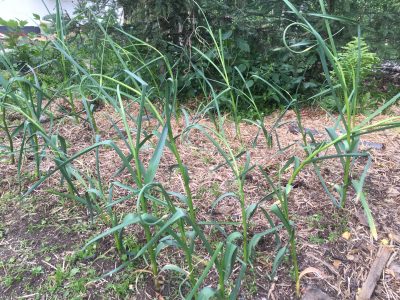
 Growing beautiful and tasty garlic in Southcentral Alaska is easy and fun! I now grow so much that I have enjoyed giving it as gifts. The dried bunches are very cute tied with a bow. The Alaska Botanical Garden performs a growing garlic class each fall. I thoroughly enjoyed this class. Much of the information in this post, I gleaned from that class and through my own experience. I also recommended the book Growing Great Garlic: The Definitive Guide for Organic Gardeners and Small Farmers by Ron L. Engeland of Filaree Farms. Please see the Alaska Botanical Garden schedule to see if they are offering the garlic class in the fall. If you want to take the class, make sure to register early. The class fills quickly. In addition to learning how to grow garlic, the class also has a fun garlic tasting that will really expand your mindset about types and flavors of garlic available.
What type to grow:
It is very important to grow hard neck garlic here in Southcentral Alaska. Hardneck varieties grow and produce much better in our cold climate. It is also extremely important to grow certified disease free seed garlic. Growing garlic that you buy from the grocery store is a good way to bring in diseases that may be infecting garlic in the lower 48. I have found great success with the variety called ‘Music’ garlic. I have also grown various ‘Korean,’ ‘Siberian,’ and ‘Polish’ hardneck varieties. The ‘Music’ garlic grows into a large head with a nice mild garlic flavor. Some of the varieties are very spicy! I love spice, but not everyone does so beware that not all garlic tastes the same. I typically purchase my garlic in the fall from Territorial Seed Company. Territorial Seed Company will often sell out so make sure to order early.
Where and when:
Plant around October for South Anchorage or 4 weeks before the ground freezes. It is best to plant garlic in full sun. Some shade is okay but my experience is this causes smaller heads. Make sure to rotate all alliums. The moose that had been eating my garden, seemed to ignore the garlic. I have only used fluffy (non-compacted), well composted soils. I like to add alfalfa and compost each fall before I plant.
Planting:
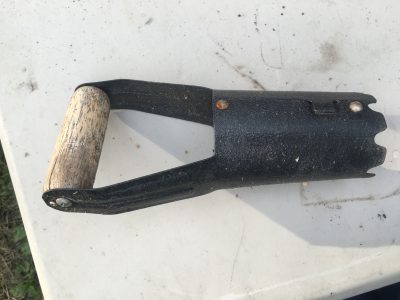
Plant 3-4 inches deep and 3-6 inches apart. I use my bulb planter (see photo) for speed and accuracy. Use extreme caution when breaking the head into cloves. In my opinion, this is the most tedious part of growing garlic. Some varieties of garlic peel apart easier than others. This “peel-ability” is another reason that I like the ‘Music’ garlic variety. If the flesh of the garlic becomes exposed when the paper skin tears open, do not plant that clove. Instead, use that clove in the kitchen. If the paper covering opens up, this will allow mold to grow and may result in deformed leaves. I have never been able to break the garlic head apart without loosing some of the cloves (no matter how careful) so I always order more heads of seed garlic than I expect to plant. 


Just before I plant my cloves, I sprinkle a little organic fertilizer that is high in nitrogen such as soybean, or certain varieties of fish meal. Plant your biggest bulbs and never more than one per hole. Make sure to plant the pointy end up and root side down. The final step is to cover with soil and mulch heavily. I like to mulch with at least three inches of fluffy straw. If you read about growing garlic in the lower 48, they recommend planting closer to the surface of the soil. Here in Alaska, I was taught that we need to plant deeper. I have heard that shallots grow very similar but they are planted a little more shallow.
Growth management:
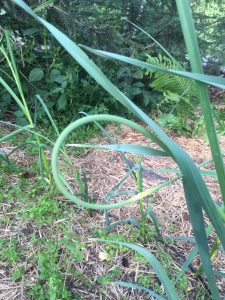
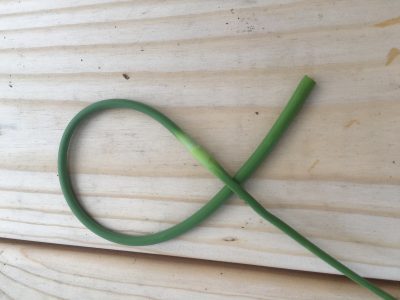
It is advised to cut scapes off in June to put more energy into bulb growth rather than allowing the plant to flower. The scapes are very tasty, with a mild garlic flavor, and can be used as chives or in pesto. Most growth of plant is before solstice. A light second fertilizing with an organic fertilizer such as soybean meal in early spring can be helpful. I have also read that a folliar fertilizer that is high in nitrogen can be sprayed on ever two weeks but I have never done this. Do not fertilize after May/June to allow good bulb formation.
Use caution when watering. I water in the spring and stop as soon as bulb formation starts. Too much water will easily cause the bulbs to rot. If spring freeze and thaw cycles have formed an ice mat with the straw insulation then remove the straw. This straw and ice mat will cause more problems than it will help.
Garlic is a very poor competitor for weeds and the garlic patch must be weeded frequently to allow good production.
Harvest and Storage:
Harvest by gently pulling up the bulbs when 40-60% of leaves are dying. Before you harvest everything, pull some sample plants and check them. If the bulb wrapper is like plastic then they are not ready. Wait to fully harvest until the wrapper is like paper. Garlic that is pulled early can be eaten but will not store well. Do not leave the garlic in the ground too long. In South Anchorage, I usually harvest in August/September. Once harvested, do not wash!!! Cut roots off right away. Leave about six inches to full length of the stalks attached to the head. Don’t cut too close to the bulb. These can be hung to dry. I use a fan in my drying area. The garlic must be really, really, dry to store well. After the heads are dry, store in a paper bag and in a cool/dry place. Storage at around 50F is ideal. If stored in a colder area than 50F and the garlic will start to sprout.
The biggest threat to garlic is mold and rot. This is true for both growth and storage. It can be difficult to replant from our own Alaska grown garlic due to our short growing season. The garlic that is re-planted must be dry enough before it can be replanted in October. Give it at least 4 weeks to dry before re-planting. If the weather is too wet and rainy, garlic may mold before it can grow.
I hope garlic becomes a fun staple in your garden!
Do you save your garlic to plant it the following year?
I have not because I have a difficult time getting it dry in time. Harvest September and plant October leaves little time to dry.
I’m trying harvesting earlier this year for exactly that reason. I’m not sure how much it grows later in the season – the garlic I harvested yesterday looked pretty good. Time will tell…