I wrote a few years ago about using Aerogarden for starting seeds. Since that piece, we upgraded our model as the old one went to the Big Compost Bin in the Sky after it died. As part of the upgrade, we added what the manufacturer calls a seed starting kit to increase the number of available slots from 6 to 23.
As a review, the Aerogarden is designed to grow complete, fruiting plants hydroponically. Many people use it for starting seeds, which it does really well for most plants, though there are some problems usually based on tiny seeds (rudbeckia) and plants (like peppers) that have higher germination temperatures.
Our solution to the problem of tiny seeds is to start them in mulch. The drawback is that our mulch has other seeds (mainly tomato and chickweed) that also start and need to be weeded out. We tried commercial plant starting soil last year. For us, it started smelling sour after a couple weeks in. Our mulch doesn’t. Consider the first lesson learned.
The first bit of research was to find if anyone was using an Aerogarden with a heat map. There were a few hits that suggested the idea was being used elsewhere without wildly damaging the equipment, so we decided to give it a try.
If you want to use an Aerogarden to start seeds that need higher temperatures for germination, you need to figure out how to heat it up a bit. One solution that we tried was to use a heating pad and a thermostat. The concern was frying the Aerogarden while it was on the pad. We found a few other problems with this approach that I will discuss later.

Current Setup
First photo is an Aerogarden Harvest with a Seed Starting System insert. Both are currently available on Amazon which also has prices listed. The LED light is set as high as possible for photography. Note that the consumables are the sponge inserts. If you use this setup for starts, you will go through them quickly.
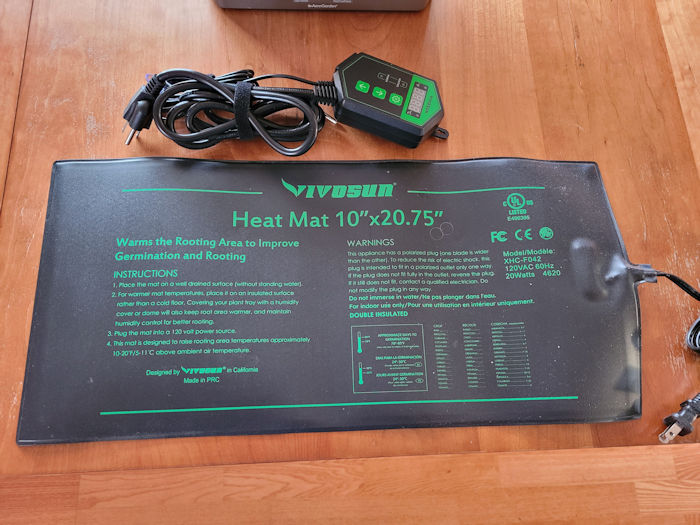
Second photo is a generic heating mat with thermostat. It is the thermostat that makes this technique possible, as you can set it to a germination temperature of your choice. Heating pads are not particularly expensive. Thermostats are the least robust part of the setup.
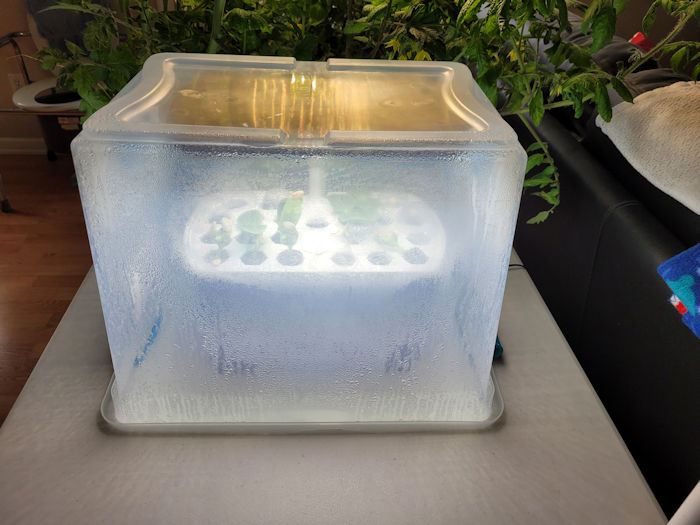
Third photo is an active Aerogarden with zucchini starts. Note the 16” x 11.5” x 11.7” inverted tub over the unit. Also note the moisture on the inside of the tub. More on this later. We found the tub at our local Fred Meyer. It has to be at least 11 5/8” deep to fit snugly over the Aerogarden lights.
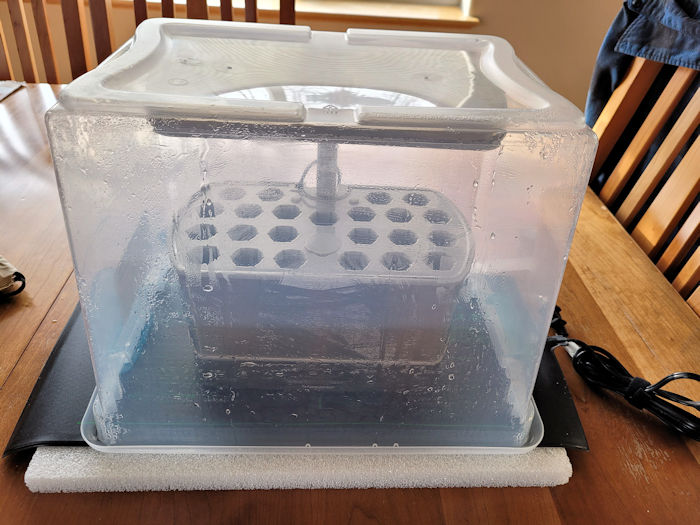
Final photo is the stack we ended up using for our heated starts. Bottom is an inch thick Styrofoam slab cut 10” x 20” (same size as heating mat). Next is the heating pad, then the Aerogarden, topped with the clear plastic tub.
How to Start
- Find a good location for your setup. You will need an extension cord with two plug-ins, one for the Aerogarden, one for the thermostat.
- Load your Aerogarden with water, fertilizer and let it run for at least an hour to get rid of chlorine in the water.
- Load your Aerogarden Seed Starting System with sponges and seeds. We draw a map of which seeds are where, as there is not enough room on the top for labels. Don’t lose the map. Leave a single hole open on the deck for the thermostat temperature probe to be in water.
- Place the Aerogarden on the heating map, start and program it.
- Plug in and program the thermostat to your desired temperature.
- Put the plastic tub over the top of the Aerogarden. This will trap moisture and a bit of heat.
- Check things once a week. Wipe water from the bottom and inside of the plastic tub every few days. Check water level in the Aerogarden once every week or two. It shouldn’t decrease quickly.
Lessons Learned
As with the use of any new tool or use of known tools in unexpected ways, we generate our own surprises. Biggest one for us was the notion of germination temperatures, as we never had cause to use them before. The peppers we plant have germination temperatures 70° – 90°F, so we set the thermostat at 78° which worked nicely for peppers. Turns out that the LED lights produce a bit of heat while the unit is on, raising temperature inside the unit by 3°- 4°F, making temperatures while the lights are on in the lower 80°s.
It turns out that this temperature range works really well for tomatoes and cucumbers. It doesn’t work all that well for dwarf sunflowers, which like it 60° – 75°F. We mixed dwarf sunflowers with other seeds that like higher temperatures and none of the dwarf sunflowers germinated.
This is the first lesson this spring: Pay attention to germination temperatures for your starts. Yes, it is possible to try to start things too hot. Who knew?
The second lesson is that while Styrofoam is a decent insulator, it is also brittle and leaves small white crumbs. The first change this summer will be to go to local Lowes or Home Depot and find a square of plastic home insulation an inch thick and cut a couple 10” x 20” pads for the stack.
Conclusions
Happily, I didn’t damage the Aerogarden (that I know of yet) and got a substantial increase in performance for starts. The problem is (as usual) going to be starting seeds too early and be overgrown with starts before we can heat up the greenhouse and get them outside. The problem is exacerbated by a late breakup, where the cold forces you to keep starts inside an extra 2-3 weeks.
Don’t know how this technique will work for other gardeners, but it provided a significant improvement in germination rates for our starts, particularly with peppers and other warm-loving plants. As usual, your mileage may vary. Cheers –
- AG
About Alex Gimarc
Twitter •