by Heidi Rader, Tribes Extension Educator
Photos by Donavan Kienenberger
If you lack indoor and outdoor plumbing like many of us in Alaska, then a rain collection system is essential for gardeners. A full tank or a slight slope is usually sufficient to provide enough pressure for a basic drip-irrigation system. Drip-irrigation is a great way to conserve water as well as water only the plants that you want to grow., i.e. not weeds. If you have a small garden, soaker hoses are a simple ways to water your garden efficiently. However, for large gardens, a drip-irrigation system is a more economical way to irrigate. 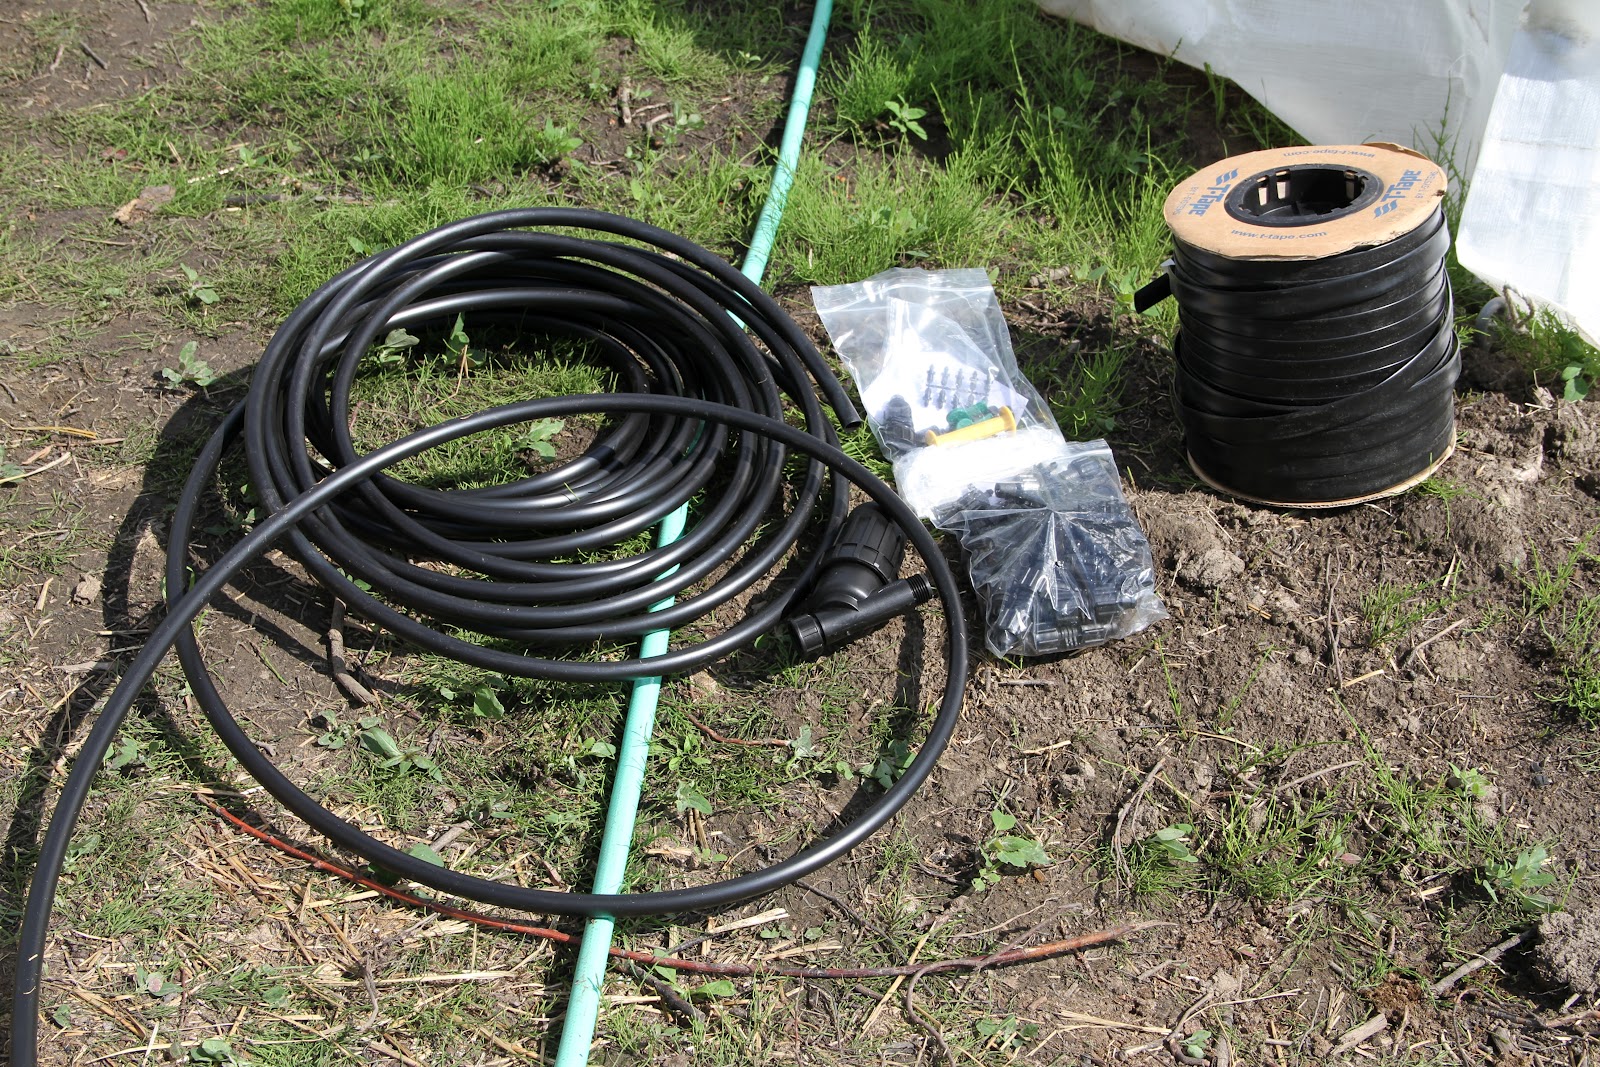 Drip-irrigation systems can be purchased as a kit or as individual pieces.
Google “drip irrigation” to find a variety of locations that sell supplies or check locally to see if someone sells drip-irrigation systems. If you’re new to drip-irrigation it can be a little confusing to know which parts you’ll need. You might consider purchasing a
kit to get started. Or look at a kit to identify which
parts are needed and then order exactly what you need for your garden.
Here is one of many ways to set-up a simple, rain-fed, drip-irrigation system.
Step 1: Set-up your rain catchment system.

First, you’ll need gutters set-up to collect rain from your roof. Then place your tanks or rain barrels (aka garbage pales) underneath the spout of your gutter. The simpler the roof is, the easier it is to set up gutters and to collect water in one location. For example, a metal, shed roof is the easiest type of roof to collect rain water from. Depending on how complex your roof is, you may need assistance from a professional to put up rain gutters. You can set up barrels so that they successively fill with water using a short piece of hose with a male and female end. They are sold at the store to prevent kinked hoses. Also, purchase a female and male hose piece that can be punched into each barrel–it has a “barb.”Plumber’s clay works well to seal these connections. Note that the tank on the left will only be filled to the height of water bale.
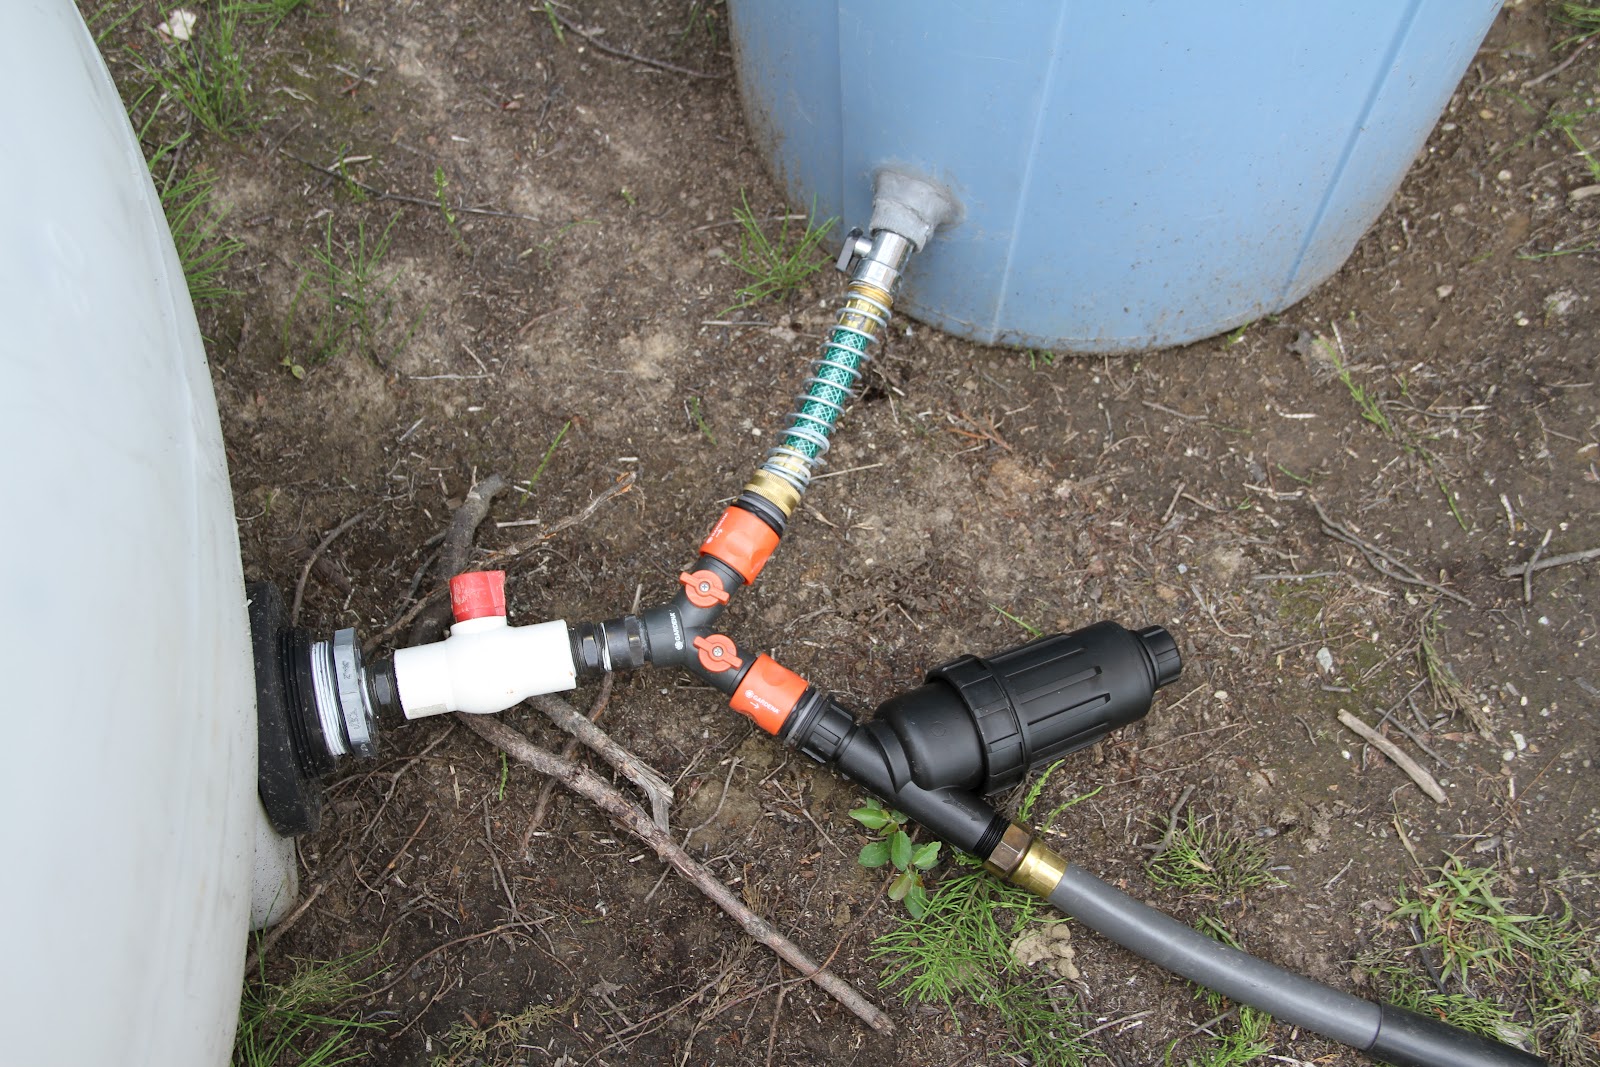 Step 2: Connect a filter.
When you purchase your drip-irrigation system, you should be sure to also purchase a filter. This can help prevent your drip-irrigation from becoming clogged. Place the filter between your tank and your drip-irrigation system.
Step 3: Run a hose from your tank to your garden.
Ideally, there will be a slight slope from your tanks to your garden. However, even the pressure from a full tank provides some pressure. Additionally, you can build a stand for your tank to provide enough pressure for a drip-irrigation system.
Step 4: Roll out main line tubing at the top of your garden.
Water will flow from your tank, to your garden, and then into your mainline tubing. Then water flows into the drip tape and into each row and your plants. Say your garden is 60 ft. x 60 ft., then you’ll need 60 ft. mainline tubing. If your garden is 5 ft. x 100 ft., then you would only need about 5 ft. of mainline tubing. You’ll place the mainline tubing closest to your tank, and ideally it should be at the highest part of your garden.

Step 5: Add an end and beginning to your mainline tubing.
The end will keep water from running out the end of the mainline tubing. The beginning will allow you to connect a normal hose to your drip-irrigation.

Step 6: Now roll out drip-tape the length of your rows.
Roll the drip-tape out the full length of each of your rows. If your rows are 2 ft. wide, one line of drip-tape should be sufficient. However, if your rows are wider than 2 ft., you might consider using two lines of drip-tape per row. It is very helpful to have two people to roll out the drip-tape. You can use a stick in the middle of the drip-tape spool to make the rolling go more easily. You can anchor the drip-tape in place using u-shaped wires.
 Step 7: Punch a hole in the main line in the middle of your row.
Punch a hole with the appropriate size punch in the middle of your row. Or if you have a wide row, punch two holes in the mainline spaced equally in your row (not too close to the edge or the water will run into the aisle). Punches come in several sizes so make sure you get the size that matches your connectors.
Step 8: Connect the drip-tape to the mainline.
 Now attach the drip tape to the mainline. You’ll poke the barb of your connector into the hole that you punched. You’ll need to make sure that you used the right punch as there are different sizes. You’ll want to make sure you push the drip-tape as far as possible into the connector and screw it down tightly. You may get some additional water at this connection–so consider planting a plant there that needs lots of water.
Step 9: Seal the ends of the drip-tape.
At the end of each row of drip-tape, you’ll need either a drip-tape end, or you can use a small piece of drip-tape (2 or 3 inches), fold the drip-tape back on itself a couple of times and use the small piece of drip-tape as a sleeve. This could save you a whopping $0.25 each.
Step 10: Turn on the hose and enjoy watching gravity work for you!

Not only is drip-irrigation a great way to conserve water, it’s good for your plants because it keeps them drier which means you should have lower disease incidence. Also, it’s a huge time saver especially if you were hand watering. This is a fun and easy system to set-up especially since it’ll save you lots of time this summer! You can even use a timer and go fishing and hunting this summer without worrying if your garden is wilting!
*Note that you may need to do some hand watering in the spring when your plants’ roots are still small. Also, if you have directly seeded vegetables like carrots or beets, then you’ll also need to hand water to make sure that the seeds are moist until they germinate.
project was supported by the Federally Recognized Tribes Extension Program of
the National Institute of Food and Agriculture, USDA Grant # 2009-41580-05332.
Any opinions, findings, conclusions, or recommendations expressed in this
publication are those of the author (s) and do not necessarily reflect the view
of the U.S. Department of Agriculture.
About Heidi Rader
Twitter •
Thank you for describing this watering technique. I really believe that good watering is key to successful gardening. It is really important to be able to maintain the soil just enough wet without soaking it too much. Really great tips! Happy gardening! 🙂