That’s right! You can make a painting using the plants grown in your garden or found locally where you live. There are several different ways in which to make the paints, however I tend to focus on watercolors because they are quick and simple with beautiful, subtle results. If you’ve dyed fabric or yarn using natural dyes before the process is similar, but since you don’t need as much dye for painting, the process is done on a smaller scale with minimal equipment. I love doing it on my own, but this would be a fun and educational activity to do with kids as well. You could have the kids choose different plants from the garden and guess what colors they might make, then they could help make them into watercolors and see if they were right.
 What you will need:
-Small jars/containers for the “paints”
-Various plant materials
-Knife and cutting board to chop up plant materials
-Small pot to boil water
-Paper (watercolor paper is best since it can handle more liquid)
-Brushes
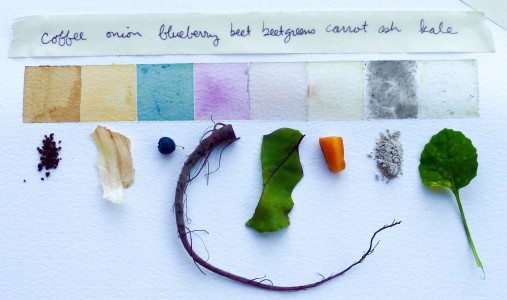
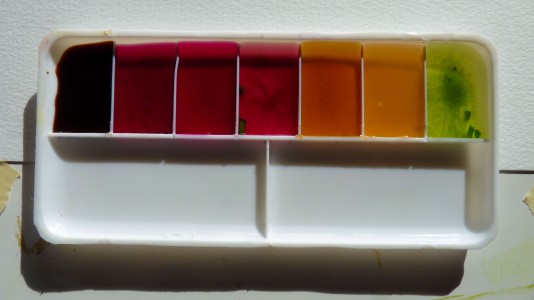
One of my favorite things about this process is how much room there is for experimentation in terms of which plants make which colors. The possibilities are endless! Some colors are vibrant with little effort such as beetroot and coffee, while others are more challenging. Green in particular is a difficult color to achieve with natural dyes, despite the fact that it is such a prevalent color in the natural world! Below is a guide to some of the colors with which I have experimented.
 Quick guide to colors:
Yellow: onion skins, marigold flowers, turmeric, dandelion flowers
Orange: carrot roots
Brown: coffee (instant is easiest), tea, dandelion roots, dirt
Purple/pink: red cabbage, beet root, hollyhock flowers, strawberries
Black: charcoal (charred wood)
Grey: ash or soot
Blue/green: blueberry
Green: spinach leaves, grass, yarrow flowers
The process:
After you’ve gathered materials, chop up the plants (if it is a flower I only use the petals) and put it into the individual jars. Then add boiling water and mix and crush the plants to help release the pigment (a mortar and pestle might be helpful). Some plant materials are more stubborn, so if the pigment isn’t coming out it might require the extra step of boiling it in water on the stove.
Next, assemble the jars of watery pigment, grab a brush, some watercolor paper, and start painting! Because the colors more subtle, it might take a couple layers to build up the intensity you want.
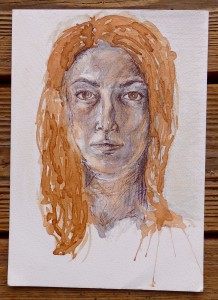
I included an example of a self-portrait I made using watercolors produced from coffee, onion skins, and red cabbage. After it dried, I used pen to create more contrast, but this could also be done with natural material such as charcoal and/or soot.
Hopefully this inspires you to go out and experiment with your own plants at home and make some truly homegrown works of art that will last long after the year’s harvest is gone.
If you are interested in reading more about plant pigments here are some interesting resources:
Lesson plan for painting with natural dyes in the classroom:
Color: A Natural History of the Palette by Victoria Finlay is a fun book that delves into the histories behind various colors/pigments.
The Wikipedia page on Natural Dye gives a nice overview of the different materials that have been used throughout history to achieve certain colors.
While it primarily focuses on dying fiber, Pioneer Thinking has a lengthy list of which materials produce which colors.
THIS is very cool. I am going to use this technique with my Environmental Kids Club next week, thanks for the great post. – Maija